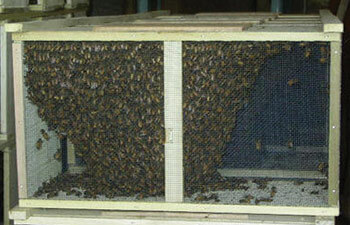
Packaged bees require a certain level of care before they can be placed in a hive. Normally, if it is a warm day out – around 60 degrees or more with little wind and rain, you can get home and get right out to your prepared hive, shake them in and not worry about it. On days that it is 40 degrees or less OR raining (pouring), you do not want to attempt to shake your bees into their hive. We recommend that you wait for a warmer day. If this should occur, there are a couple of steps you need to know to take care of your bees while they are still in their packages.
Your three pound package of bees will look something like this. (Figure 1) In the center hanging down from the top will be a can of sugar syrup your bees have been feeding on since being packaged. To the right of the feeder can is the queen cage (Figure 2). Next to that can, and from the
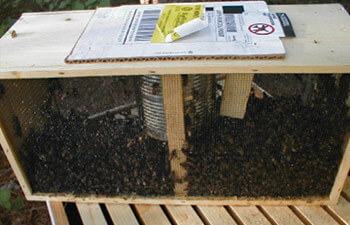
top you will see a silver tab – that’s the tab for the queen cage. (Figure 3).
First, your package will have enough feed to last them about two more days. At that point, you will have to feed them in the package if the weather does not permit you to shake them into their hive. Your packaged bees come with a can in the center which is easy to refill – simply punch a hole in the top, while leaving the can in the package, and add more feed. For feed, we recommend fructose, mixed at 7 parts to 3 parts of warm water, or sugar diluted in warm water mixed to a consistency of syrup. (Mix a 10 lb. bag of sugar to 5 gallons of water, or the
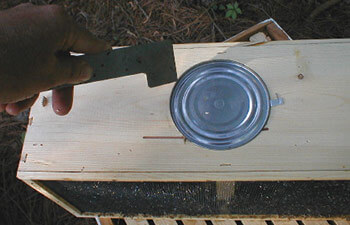
equivalent thereof).
The second step is to keep them warm – around 60-70 degrees is recommended. If they get cold while in the package, they could potentially die. Put them in your basement or garage or even in your house in a darker area if it is too cold
to shake them out when you get home – just make sure they are kept in that 60-70 degree range. When transporting your packaged bees in cold weather, we recommend that you keep them inside your vehicle. Set them upright on your seat or on the floorboard – make sure the package cannot tip over, and they will ride fine. The bees can not escape from the package unless the feeder is removed.
Shaking your bees.
Step 1. Remove three to four frames from the center of the hive
Step 2. Remove the card board top cover from the shipping package with your hive tool or knife (the cardboard cover is there to hold in the can of sugar syrup, not to keep the Bees in place, Bees will not come out when the card board cover is removed)
Step 3. Pick the package up and sharply knock it on the ground to knock the Bees off the sides and top
Step 4. Using a knife or other tool, pry up and remove the can of Sugar Syrup from the Package
Step 5. Remove the caged queen from the package (the queen cage is shipped with either a strip of aluminum or wire attached to it so that it can be attached to a frame within the hive. DO NOT
remove the wire or strip)
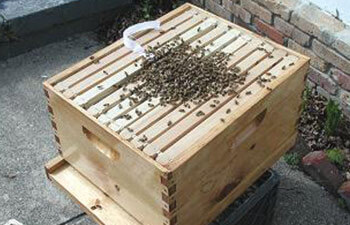
Step 6. Turn the package over with the opening directly over the top of the hive. Shake the bees out of the shipping package directly into the frames. (Figure 4).
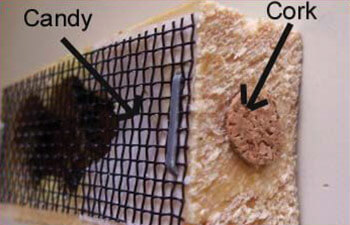
Step 7. Your queen cage may have a piece of candy acting as a cork – if that’s the case in your package, just leave it in and set the queen in the hive. If both ends of queen cage is corked with no candy (most likely scenario), while directly over the hive, remove a cork – don’t let the queen out by using your finger, then plug that hole with a gum drop, creamed/spun honey or something bees can eat out. The workers bees will eat the candy out allowing the queen to escape.
Step 8. Using a thumb tack or small nail, securely attach the queen cage to one of the frames which was previously removed with the mesh screen facing outwards between frames
Step 9. Replace the frame with queen cage attached (make sure the queen is facing outwards and facing the foundation. the wire mesh should be clear and easily accessible for the Bees to access the
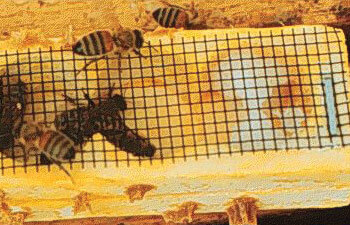
wire mesh of the queen cage). Put this frame in the middle of the hive. Note: In order to replace the removed frame with queen cage attached, it may be necessary to remove one or two outer frames to allow room the frame to be re-inserted. Make sure the queen cage is facing toward the length of the frames and not toward the wax foundation.
Step 10. Replace any frames that were removed from Step 1.
Step 11. Replace inner (if you have one) and top covers
Step 12. Some bees will still be in the package – just set the package in front of the hive – they’ll get out and go in the hive at that point. 24 hours later, you can check the activity and pull the queen cage out if queen is out and make sure your entrance feeder, division board feeder or hive-top feeder has plenty of syrup. FEED YOUR BEES FOR AT LEAST A COUPLE OF WEEKS!!!
(Figure 5) is an example of a typical queen cage. Queen is marked and on far left inside cage in left pic. Note she has worker bees inside cage with her called “attendants”.
(Figure 6) is an example of the cork you will have to remove and replace with a DOTS gum drop, thick spun honey or equivalent.